The Products section allows you to add, manage, and edit the products available on your shop. It provides a simple way to manage stock levels, set prices, and organize your product catalog.
Steps to Add a New Product:
Log into Your Olitt Dashboard: Start by logging into your Olitt account and navigating to your Shop Dashboard.
- Navigate to the Products Section:
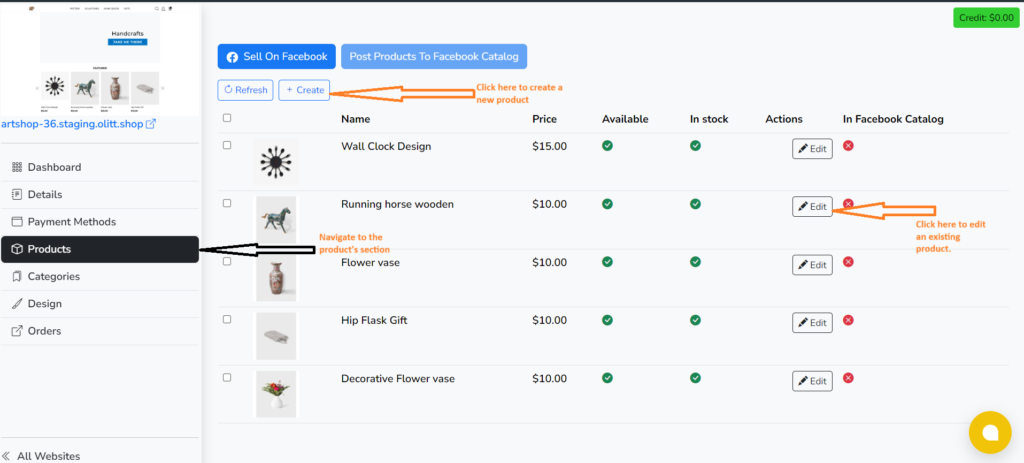
- On the left-hand sidebar, click on the Products tab. This will show the current list of products available in your shop.
- To add a new product, click the blue Create button at the top (as shown in the image below).

2. Create a New Product:
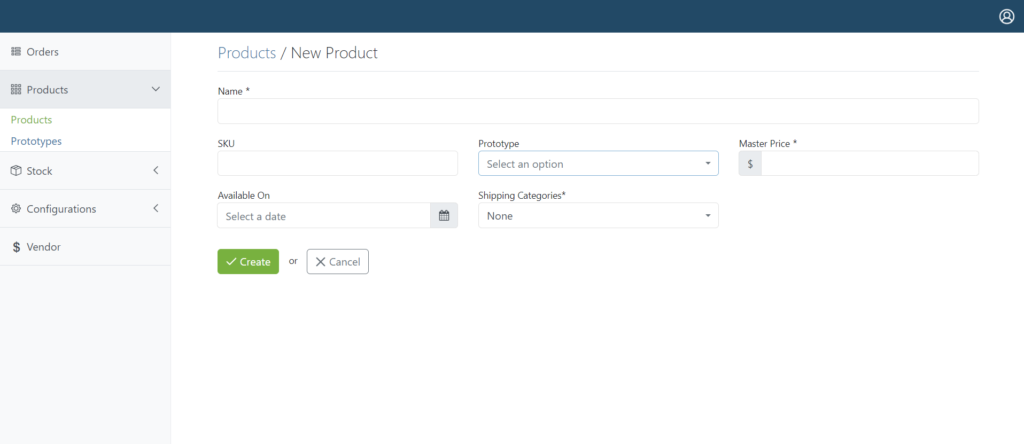
- You will be taken to a new screen to fill in the product details (as shown in the image below).

- Enter the required product details:
- Name: Provide the product’s name, which will be displayed on your shop.
- SKU (Stock Keeping Unit): A unique identifier for the product, used to track inventory.
- Prototype: Select the product category or type.
- Master Price: Set the price for the product that will be visible to your customers.
- Availability Date: Specify when the product will be available for purchase.
- Shipping Categories: Choose the shipping category to which the product belongs.
3. Save the Product:
- Once you’ve entered all the product details, click the green Create button to save the new product to your store.
4. Managing Existing Products:
- You can also manage existing products by clicking on the Edit button next to any listed product in the Products section (as shown in the first image).
- This will allow you to modify product details like price, stock status, and availability, or remove the product from your catalog if needed.


Leave A Comment?