To ensure your customers can complete their purchases, it’s important to set up the appropriate payment methods. Here’s a step-by-step process to guide you:
Log into Your Olitt Dashboard: Start by logging into your account and navigating to the Shop Dashboard.
Go to Payment Methods:
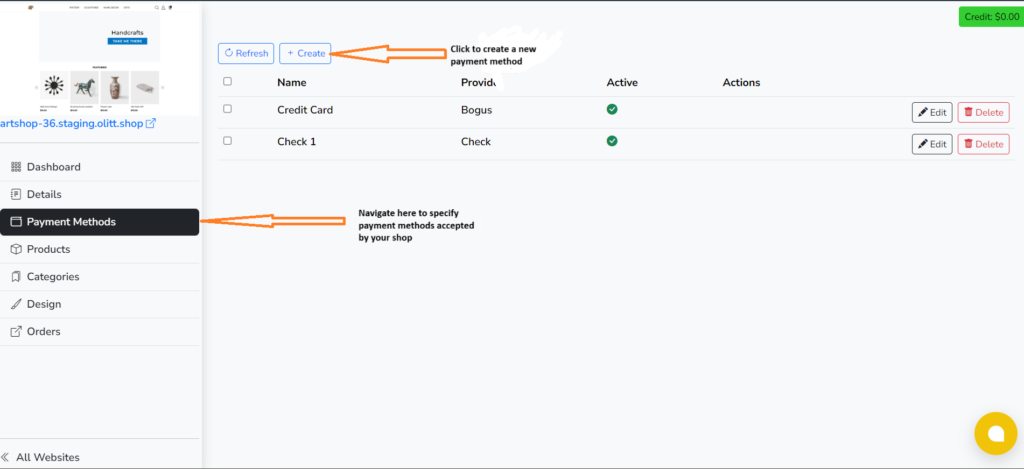
- In the left-hand sidebar, click on the Payment Methods section. This will show a list of any existing payment methods already added to your shop.
- To add a new payment method, click the blue Create button at the top (as shown in the image below).

Create a New Payment Method:
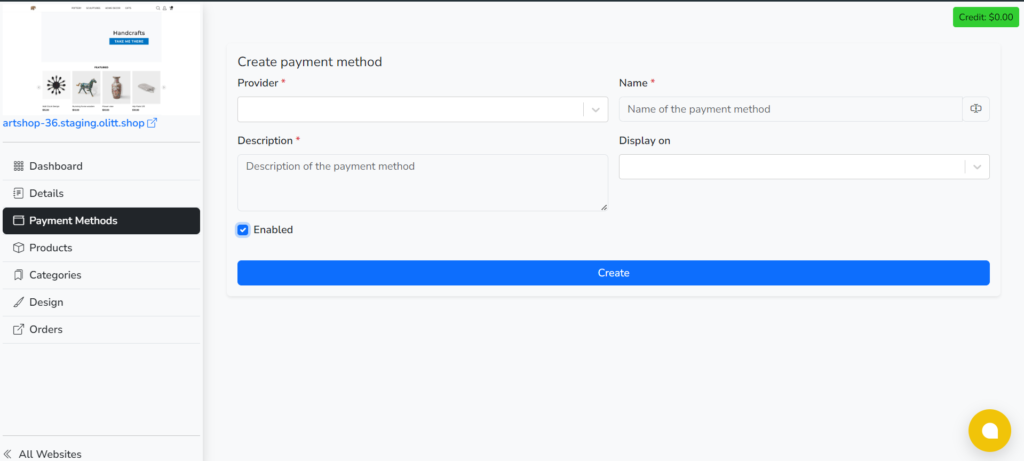
- You will be taken to a screen where you can create and configure the new payment method (as shown in the second image).
- Here, you need to:
- Select a Provider: Choose a payment provider from the dropdown. Examples could be PayPal, Stripe, or manual options like Bank Transfers or Mobile Payments.
- Name the Payment Method: Enter a user-friendly name for the payment method (e.g., “Credit Card” or “Mobile Payment”).
- Description: Provide a short description for the payment method. This helps customers understand how they can use it during checkout.
- Display On: Select the parts of the shop where this payment method should be displayed, such as during the checkout process.

Enable the Payment Method:
- Make sure the Enabled box is checked to activate this payment method for your customers.
- After filling in all the details, click the blue Create button to save and add the payment method to your shop.
Review and Manage:
- Once added, the payment method will appear in the list under the Payment Methods section. You can always go back to edit or delete it using the Edit or Delete buttons next to each payment method.
You can also follow the video guide for a detailed process https://youtu.be/A72zFvsUrIQ?si=iyFuzAaCTjz8sdhq


Leave A Comment?