Your shop’s frontend is the interface your customers see and interact with when browsing products and making purchases. A well-designed frontend improves user experience, making it both visually appealing and easy to navigates aesthetics with functionality, creating a seamless, intuitive, and visually appealing experience. Here’s a breakdown of the elements that make up a typical shop front-end design.
- Follow the steps below to manage your shop’s design:
- Log into Your Account: Start by logging into your Olitt account and navigating to your dashboard. This dashboard serves as the control center for managing your shop.
- Access the Shop Management Panel:
- From the Websites section, find your shop.
- Click on the “Manage” option under Site Actions to access your shop’s management options.

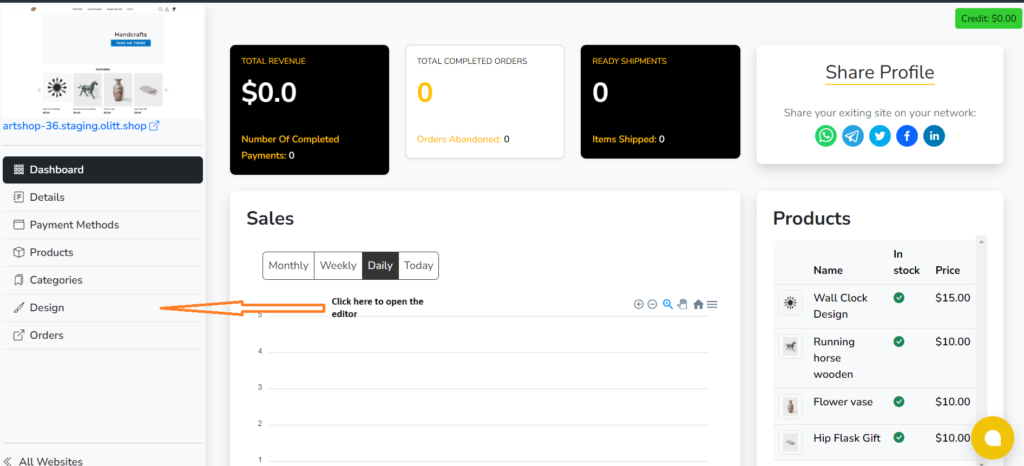
Click on Design to open the editor for your shop’s frontend.

4. Using the Editor:
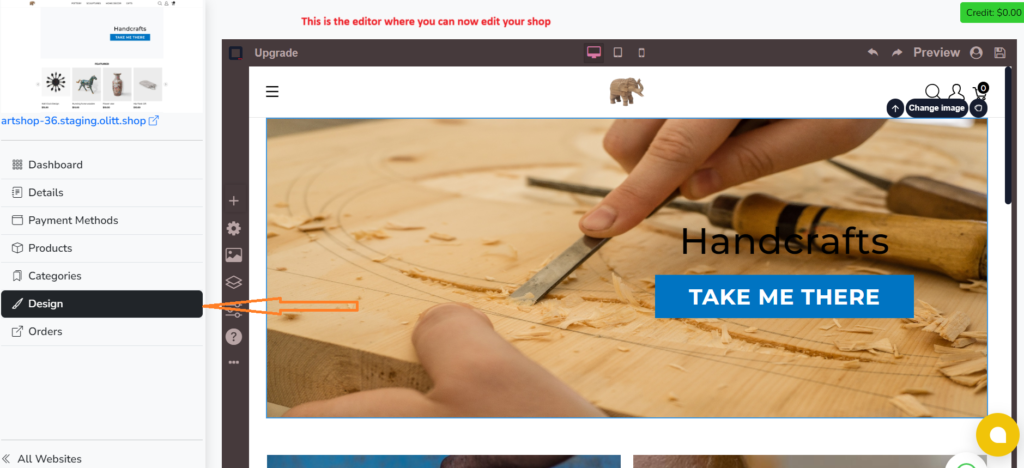
The editor provides drag-and-drop functionality, allowing for easy modification of your shop’s layout and design.
You can change images, update text, and adjust other design elements directly from this editor.
You can modify:
Text: Change the text color, size, and font style to match your brand identity.
Images: Replace or adjust images to keep your shop updated with fresh visuals.
Layout: Customize the layout of product listings, banners, and any other section for a better user experience.

5. Save and Preview:
After making the necessary adjustments, make sure to save your changes.
You can also preview your changes by clicking the Preview button to see how your shop looks before it goes live.
By following these steps, you can create a seamless, intuitive, and visually appealing shop front-end that will attract and retain customers.


Leave A Comment?